Building a Cybersecurity Homelab #1
Blog post description.
11/28/202412 min read
Building a Cybersecurity HomeLab #1
When I started learning about cybersecurity, I kept reading about the importance of hands-on experience, so I decided to build my own homelab.
I’m still figuring things out as I go, and I’ll share what I’m learning along the way. My setup is a mix of trial and error, new discoveries, and sometimes plain mistakes (lots of them), but that’s what makes this so valuable.
Why I’m Building This Lab?
I’ve set a few goals for this lab to keep myself focused and make sure I'm learning the right skills. Here’s what I’m aiming for:
Understand Network Security Basics: I want to learn about firewalls, network traffic, and security controls in a real-world setting
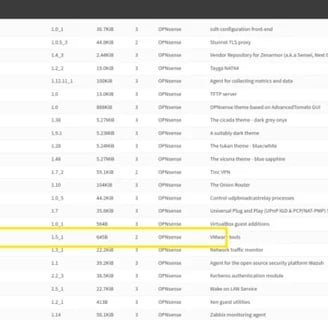
Practice Threat Detection: I’m going to try setting up Wazuh and Splunk to monitor logs from different machines and hopefully catch some security events I generate myself.
Simulate a Windows Domain Environment: I’m putting together a setup with an Active Directory server and some Windows clients to get familiar with managing user accounts and security policies.
Explore Vulnerability Management: By adding some intentionally vulnerable machines, I’ll be able to practice finding and fixing security issues (and maybe learn a little bit about pentesting along the way).
Experiment with Virtualization: I want to get comfortable with VMware, managing VMs, and keeping the setup organized.
Get Hands-on experience to demonstrate my expertise when looking for a job.
Here's what my lab includes (at least, the current version of it):
OPNsense Firewall: This is the core of my network security setup. It’s an open-source firewall.
Monitoring Tools: I decided to use both Wazuh. Wazuh will be my main SIEM tool, but I also want to explore Splunk’s log analysis features to get familiar with different approaches, so maybe in the future I will install the free version of it.
Servers: I have an Active Directory domain controller, an email server, and a couple of Linux servers for various purposes.
Vulnerable Machines: I’m using VulnHub VMs, which are intentionally vulnerable for practicing exploits and security fixes.
Client Machines: Windows and Linux clients to simulate a more realistic network environment.
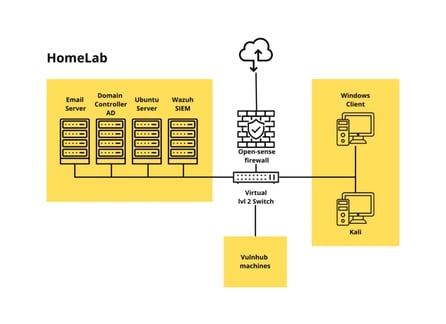
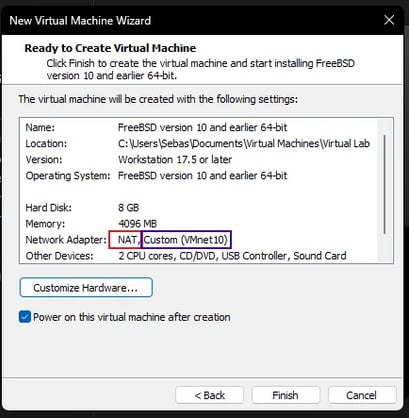
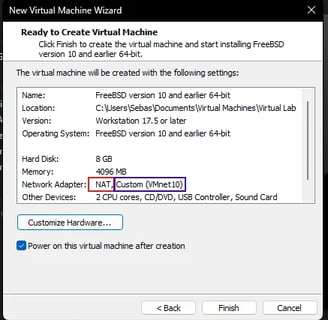
With everything on the table, let's get started, I will use VMware as my hypervisor already has it installed, so let's start with the VMs, first the core of the lab. Open sense.
Installing Open Sense:
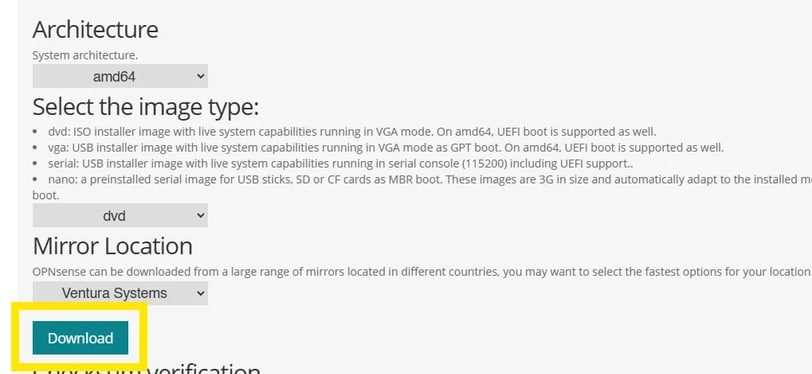
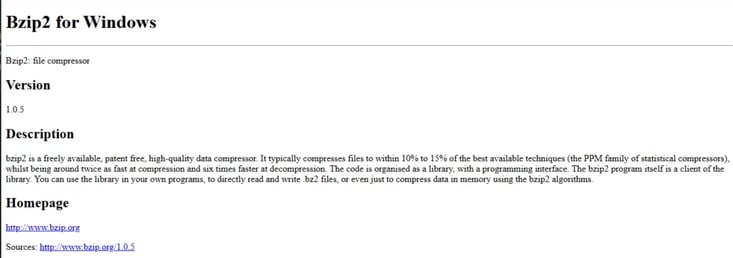
I went to Open sense page, here is the link: https://opnsense.org/
First, download the ISO file. In the "Getting Started" section of the website, you'll find the minimum requirements—let's work with those. As you scroll down, you'll see a download button, which will take you to the download page.
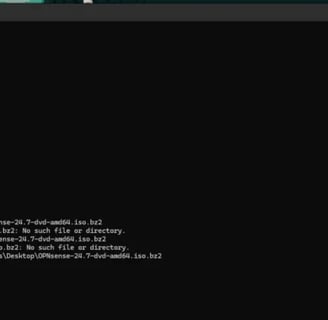
After downloading the ISO, I noticed it was compressed in a .bz2 format. I did a quick search and found that I needed a specific tool to decompress it. I found one, so I downloaded it. Here’s the link: https://gnuwin32.sourceforge.net/packages/bzip2.htm.
After a couple of tries of putting the right directory name for the file we got it decompressed!

Now let’s create the VM. For this, we have to configure a couple of network adapters—one for the WAN and another for the LAN.
The WAN will be assigned by DHCP from my ISP, and the LAN I’ll assign to the firewall.
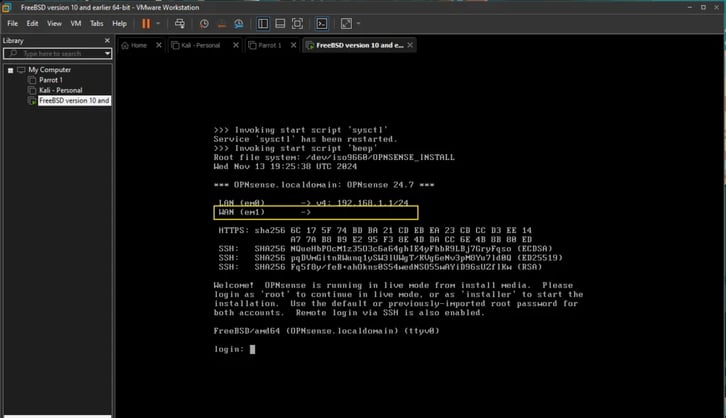
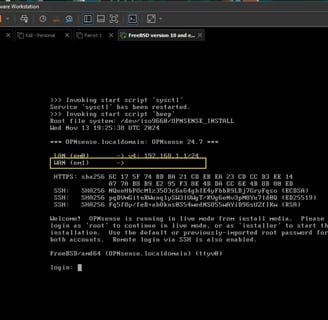
Once installed, I noticed something: my WAN interface doesn’t show anything, so I’m a bit worried about that. But I’ll continue and see what happens!
installing, so I chose "installer" and continued with the installation process. By the way, the default password is "opnsense."
I selected the default keyboard—nothing special there—but this next part is important since I wasn’t sure what it meant at first.
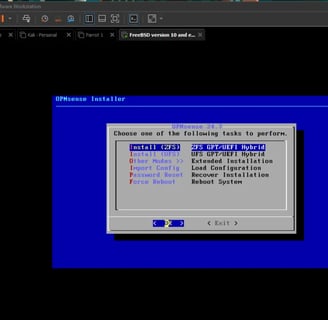
It asks you to "Choose one of the following tasks to perform":
ZFS (Zettabyte File System): A file management system that uses something called virtual storage pools.
UFS (Unix File System): A file management system similar to how it works in Unix systems.
Since I’m more accustomed to Linux systems and not really sure how ZFS works, I’m going with UFS.
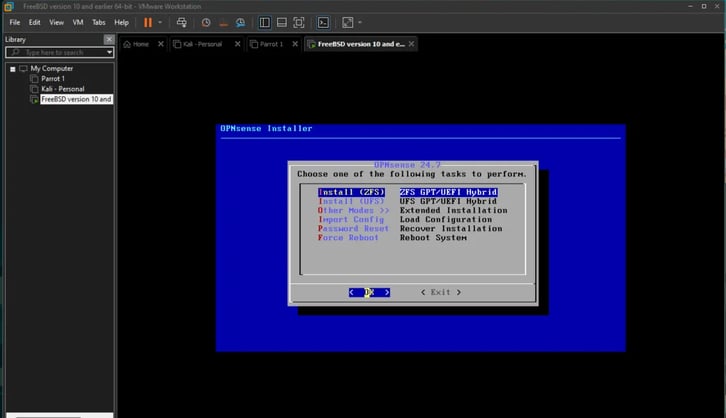
Then, it asks which disk to use. Since we only have the virtual disk we created, I selected that one.
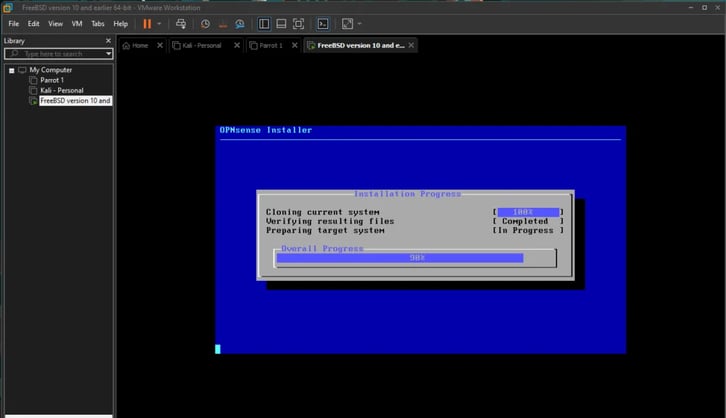
There's a warning: "[!] Last chance! Are you sure you want to destroy…" but it's fine because the disk is completely new and a virtual one. So, I clicked "Yes," and the installation of OpenSense began.
Once it's done, it will ask you to exit and reboot—so let's do that! BUT before you do, you can change the default password for the root user, which is actually important. I changed my password first, then rebooted.
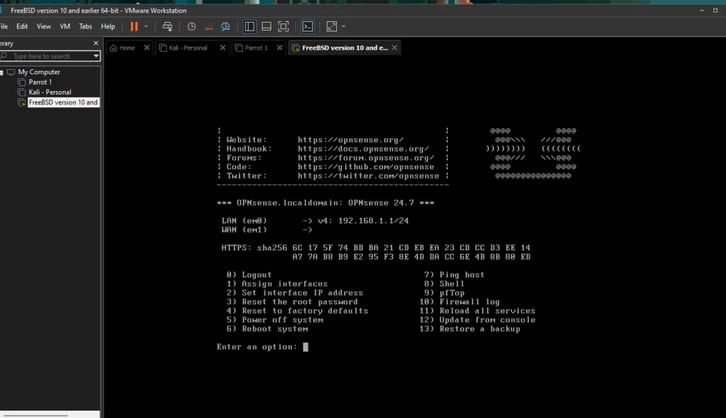
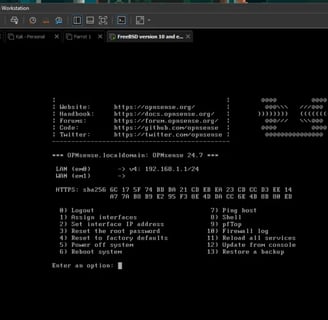
And here we are! I just logged in as root and can start doing some stuff with my OpenSense firewall.
Let’s start by assigning the interfaces!
Configuring Interfaces
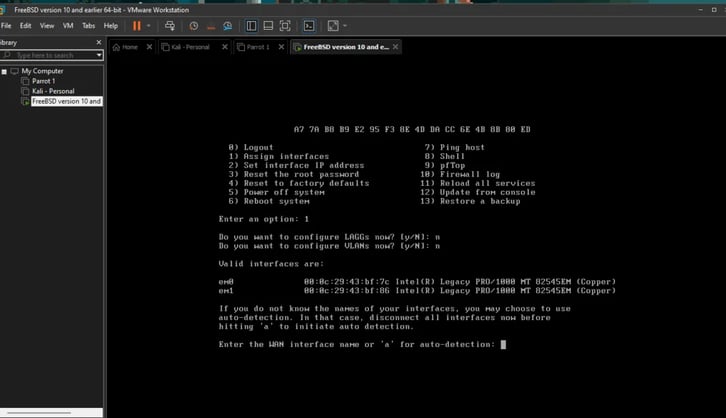
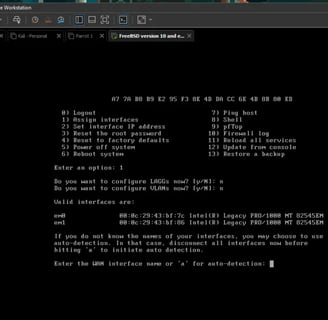
It asks if you want to configure LAGGs. I did a bit of research to understand what that is, and it’s similar to EtherChannel on Cisco.
Link Aggregation (LAGGs): It combines multiple connections in parallel to increase bandwidth and redundancy.
I actually won’t set that up, but researching these terms helped me gain a better understanding of networking, which is pretty cool.
Then, it asked if I want to configure VLANs. For now, I’m skipping this, but eventually, I might create a couple to isolate vulnerable machines from others.
The next question is about the WAN interface. It asks which interface I want to use for that. I assumed it’s em0 since it’s the first one, but I wanted to make sure. I checked the MAC address in VMware, and it was indeed em0, so I chose that!
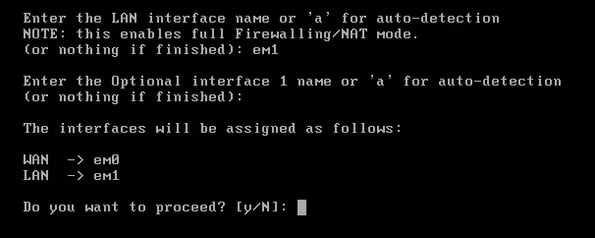
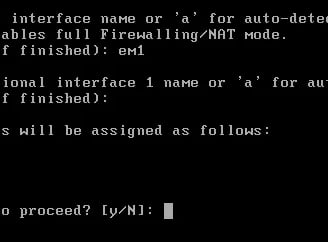
Same for LAN I assigned em1, and then it asked for a name. I didn’t add one and just proceeded. The PC started doing a bunch of configurations and then brought me back to the main menu.
Now, let’s configure the IP address for my VM, specifically for the LAN.
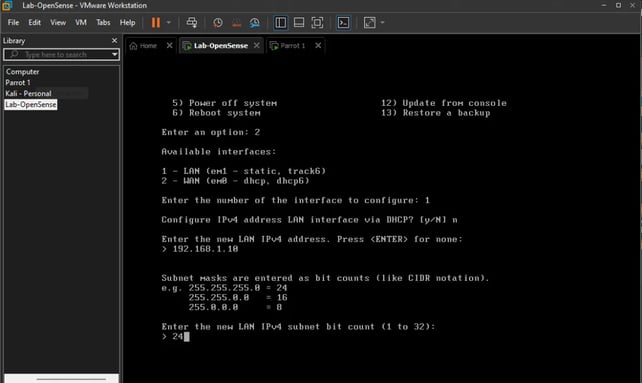
OK, we chose to modify the LAN IP address. It asked if we want to use DHCP. Since I want static routing for the LAN, I chose "No." Then it asked for the IP address for the firewall, and I decided to use the 192.100.1.1/24 range for my LAN setup.
After that, it runs the IPv6 setup. I didn’t add any IPv6, so I just skipped that part. At the end, it asked if I wanted to change HTTP to HTTPS. I chose "Yes," but since this is just a home lab, it won’t affect anything. In an enterprise environment, however, this would be necessary.
NOTE: For now, I’ll use a Parrot machine that I’ve preinstalled. I just added a new network adapter for it to work on the internal network. But later, I’ll probably switch to a Kali machine.
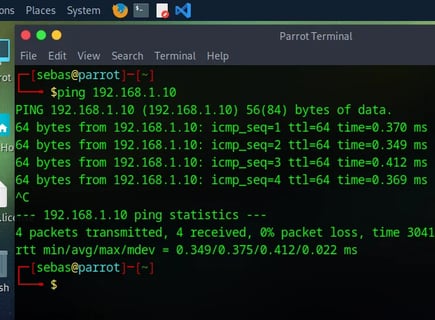
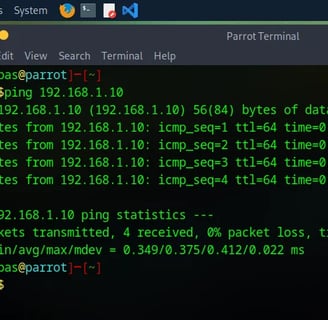
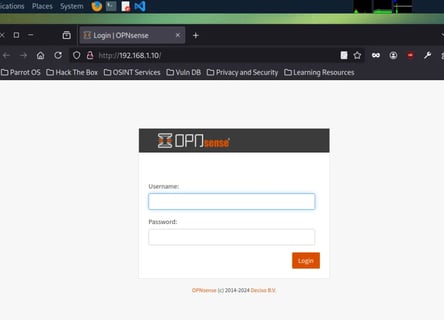
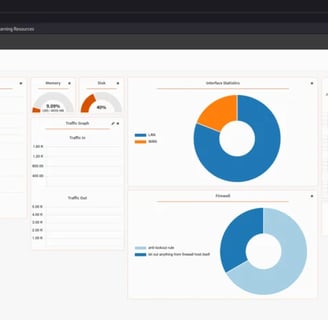
As you can see, it's working perfectly! :) I have a connection to my firewall server and can now access the web GUI!
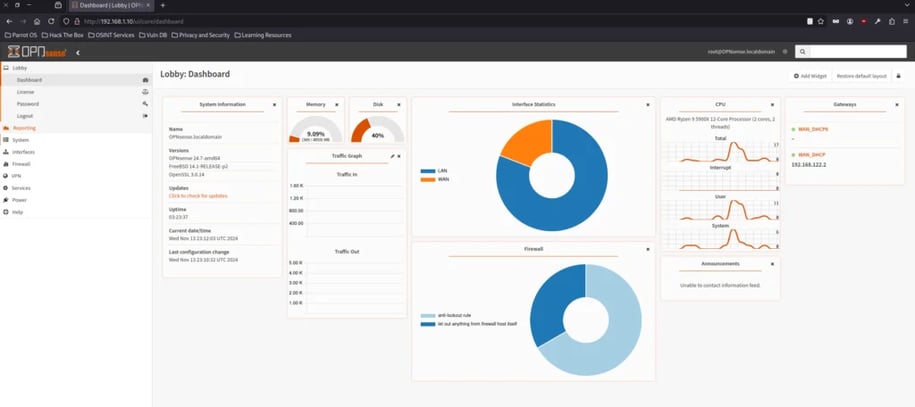
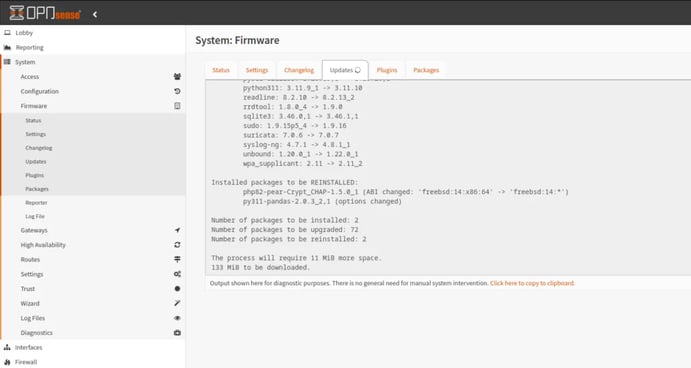
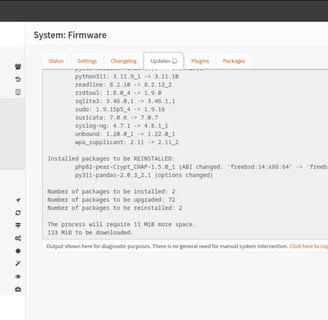
Once in the Dashboard, we can go to System-Firmware-Status and In there we can search for Updates to start using the newest version of Open Sense. There was Updates so it take some time and Download everything that was new.
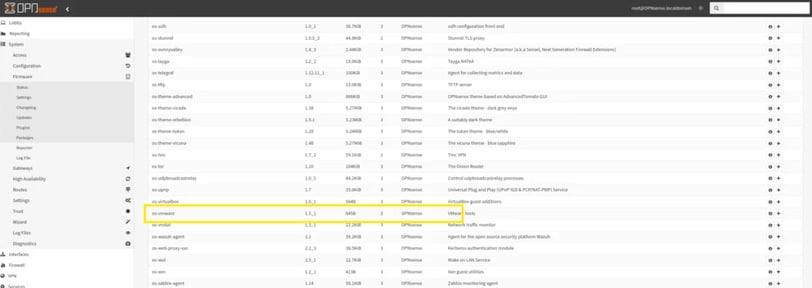
Next I look for the VMware tools plugin. My understanding its that with this plugin installed you can have better performance. So I think its worth it because I didnt assigned a lot of resources for this VM.
Its in the same place where you update, you just need to move to the plugins tab and scroll down until you find the plugin.
Now everything its set up and fully updated and connected lets set up our IDS.
Suricata IDS/IPS set up
IDS - Intrusion Detection System: Its a software that helps to detect potential Intrusions to our system, it generate reports based on the rules that we set up previously. In this case we will use Suricata bcause its actually included with OpenSense.
First we are going to move to Interfaces - Settings.
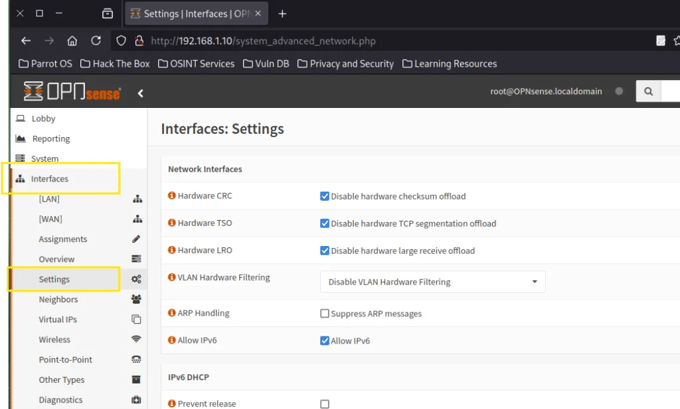
We need to uncheck the Hardware CRC, Hardware TSO and Hardware LRO. Open Sense documentation explain that if we want to set up an IPS its recomendable to desactive this options because of posible problems related to network card right here if you want to give it a check: https://docs.opnsense.org/manual/interfaces_settings.html
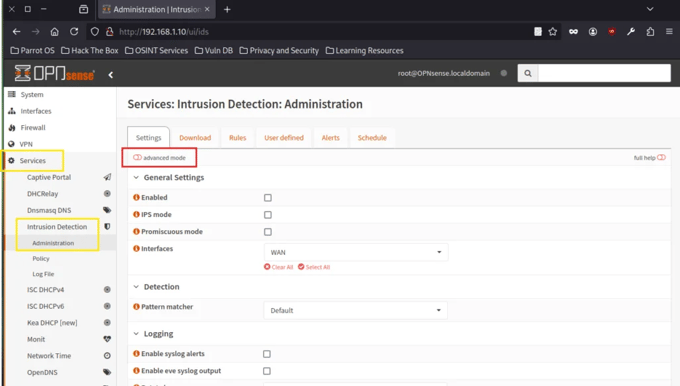
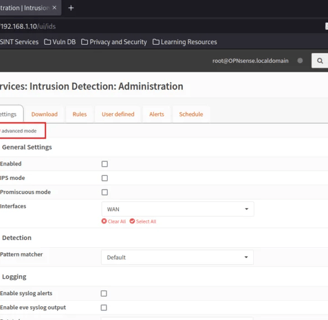
Now lets move to Services - IDS - Administration and select to activate "advanced mode".
I am using a lot the Open Sense documentation to guide me on the set up. I love when open source tools also have great documentation to guide you through your instalation.

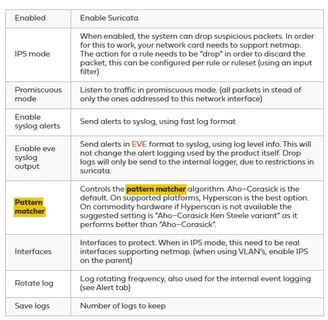
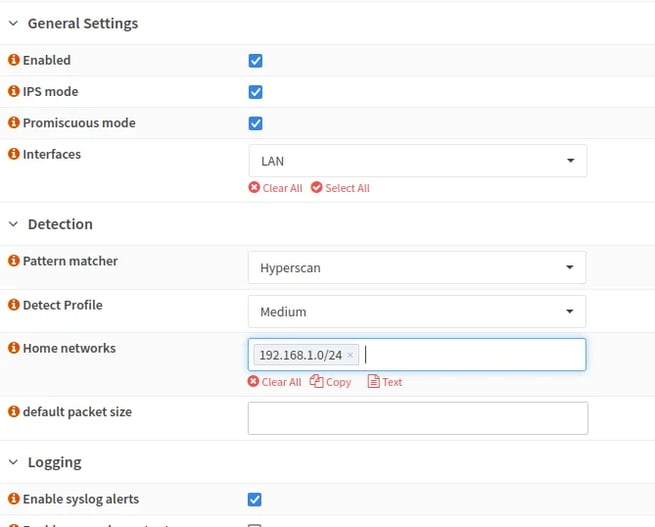
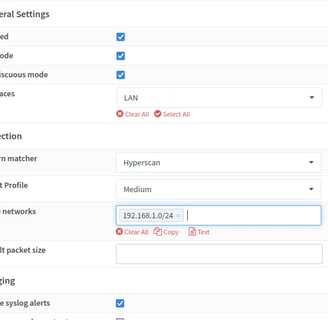
Here is what I enabled the following options:
Enabled Option: This activates Suricata.
IPS Mode: Unlike IDS, which only generates reports, IPS can actively drop packets.
Promiscuous Mode: This allows Suricata to read every packet arriving on the network.
Pattern Matcher: Based on the documentation, Hyperscan is the best option, so I chose it (hopefully, it doesn’t consume too many resources).
Interfaces: Since I only want it to work within the lab, I selected the LAN interface.
Syslogs: I enabled syslog alerts. Syslog is a protocol that records events into logs, which can later be compiled and analyzed for information.
Now we have our IDS/IPS up and running! Let’s add some rules to start detecting and dropping suspicious packets.
Suricata rules are similar to Snort rules, which I’m a bit more familiar with, so that’s pretty good for me. Like Snort rules, Suricata rules can get really complex. Thankfully, we can find pre-written rules online. I’ll try to write my own rules whenever possible for practice and learning, but I might also use some pre-written rules as needed.
By the way, here’s Suricata’s documentation on rules: Suricata Rules Documentation
First, I want to simulate a port scan using Nmap and try to detect it with Suricata. Here’s my first attempt at creating a rule.

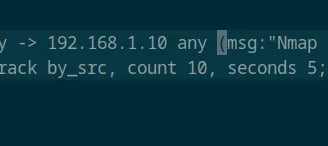
Alert: This is the action that Suricata will take. We can also configure it to drop the packets.
TCP: This is the protocol that Nmap uses.
$HOME_NET any -> 192.168.1.10 any: This defines the source and destination. In this case, it’s from anyone in my network on any port to my firewall's IP on any port.
msg: This is just an identifiable message.
flags: S: This is because Nmap sends SYN (Synchronization) packets, and we want to detect that.
threshold: This keyword sets the frequency of alerts. Here’s the Suricata documentation on thresholding because it’s a bit hard to explain, haha. I chose "both" to set how many alerts and the limit.
sid and rev: These are just the ID for the rule and an indicator that this is the first version of it.
Let’s add it to OpenSense and see if it works:
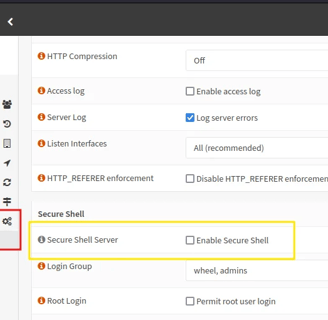
To do this, we’ll need to access the OpenSense machine via SSH. By default, OpenSense has SSH turned off, so we need to enable it. Go to System > Settings > Admin, and enable Secure Shell.

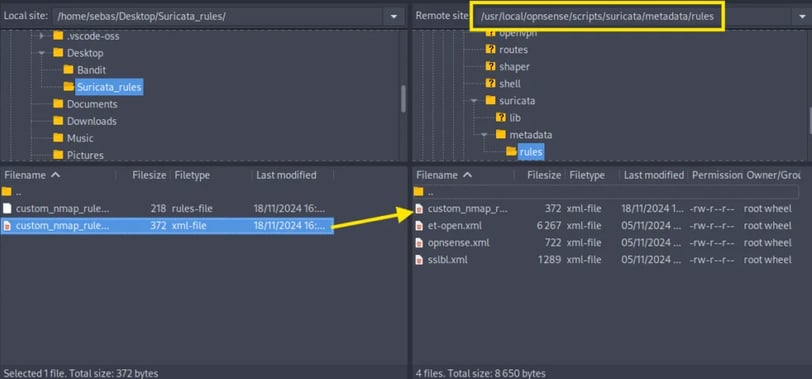
Now, to send files to the machine, we’ll use FileZilla, an SFTP app that helps transfer files over SSH.
I just added my credentials and made a quick connection.

This part was a bit confusing for me, but I found this post that helped a lot: OPNsense Forum Post.
We need to upload two files to OpenSense:
The actual rule file.
An XML file to guide OpenSense in finding and downloading the rule.
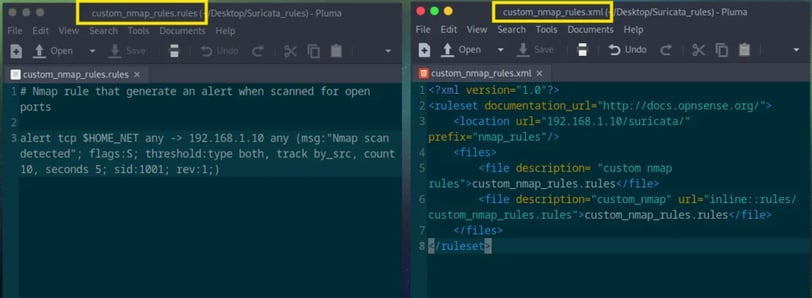
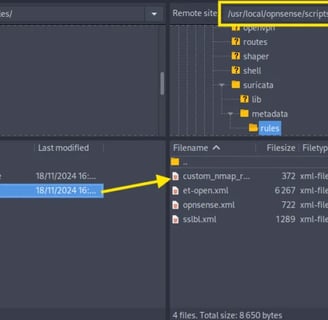
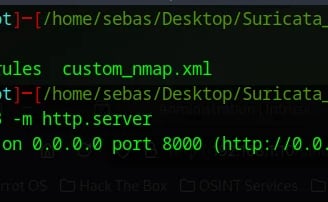
Now, back to FileZilla. We only need to transfer the XML file to the following directory:
/usr/local/opnsense/scripts/suricata/metadata/rules.
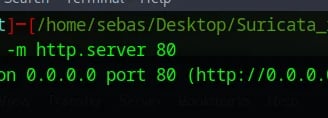
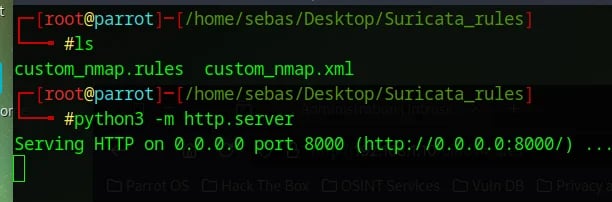
Once that’s done, we’ll set up a Python 3 HTTP server so OPNsense can download our rules.
I’ve never done something like this before, and it’s pretty cool that we can quickly set up an HTTP server to allow our VM to fetch files.

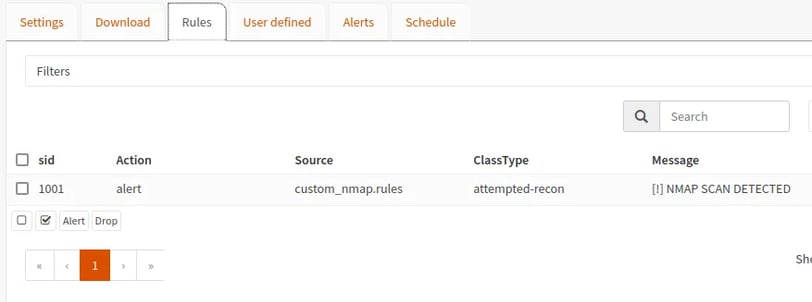
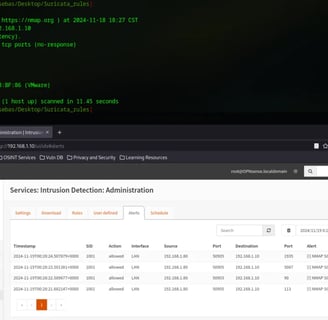
Back in OPNsense, we navigate to Services → Intrusion Detection → Admin → Download, and then restart the IDS.


Once restarted, our rule appears! Great! I was a bit nervous that I might mess this up, but it worked perfectly!
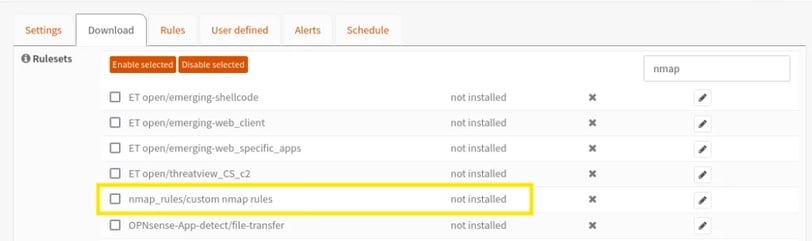
We selected the rule, and at the bottom, we chose "Download & Update."
Everything was going smoothly until this step... :( Why? Haha
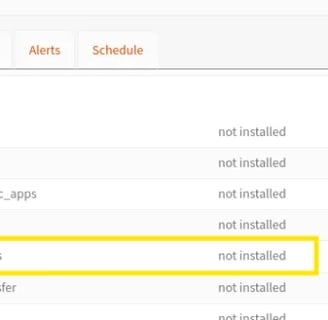
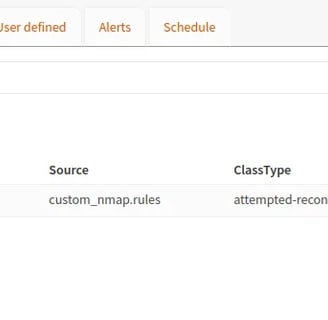
The rule appears in my rulesets, but when I click on "Download & Update," it doesn’t install.
As you can see, it appears to be enabled but not installed. We need to fix this to use the rule properly.


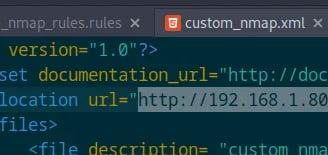
Ok, I decided to check the example XML file from the forum guide again and realized I missed the "http://" when adding the IP.
That was the issue! xd

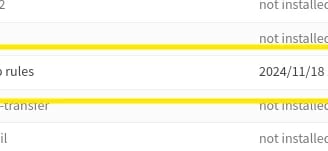
It’s downloaded!! But there were more issues. My rule wasn’t showing in the Rules section.


I renamed my file to check if it was something related to spaces in my XML file. After troubleshooting the XML and realizing that the problem still wasn’t solved, I assumed the issue was with my rule. So, I decided to try changing the rule.
This took about an hour for me to figure out.
NOTE: This blog is meant to document my learning process, not to give a step-by-step guide. For that reason, I’ll include everything here, even the mistakes I make along the way.
Now, let me explain what I found out. I believe there were actually two mistakes.
The first one was related to the XML file. In the Location, I added the OPNsense machine’s IP instead of the Parrot machine’s IP.
Dumb mistake #1

The second mistake, I’m not sure if it’s actually an issue, but I initially launched my Python server from the home directory. Then, I decided to move it to the directory where the files I wanted to transfer were located and started the Python server from there.
Dumb mistake #2!
Those two changes made my rule download and appear in the Rules tab.
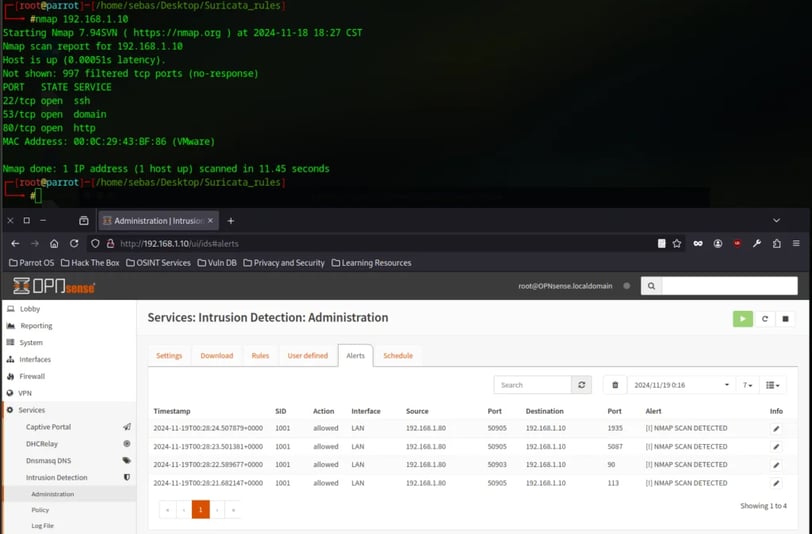
Cool! After all this stress, let’s test our rule and IDS!
And there it is, it generated alerts about scanning on different ports. So, when someone (me) tries to scan for open ports, we get alerted!
Okay, the post is getting a bit long, so I’m going to turn this homelab into a "series" of posts, where I’ll keep making progress until I have a fully functional lab.
Let’s recap everything we’ve done: We created a VM with OpenSense, set up a virtual LAN through VMware, and wrote a Suricata rule to configure an IDS. Later, I’d like to experiment with even more rules.
There’s still a lot left to set up, including more OpenSense details we’re going to test. I also want to install Wazuh and spin up some machines using Docker Compose.
To wrap up, thank you so much for reading and following along if you made it this far! This is the first of many projects I plan to share on this blog. It takes me quite a bit of time to write these posts because I focus a lot on learning and understanding what I’m doing and why. Also, I’m not used to documenting every step of a project.
Anyway, I’ll sign off for now and see you in the second part of the Homelab series!